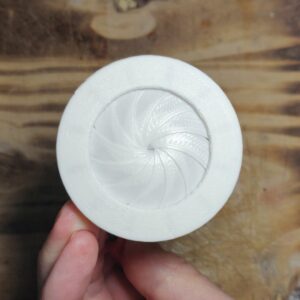
A challenge I set myself recently was to create the best engagement ring box possible. I have designed one in the past (which you can also 3D print), and although it functions well, I felt there’s plenty of room for improvement. There are some other great looking ones already available out there on the internet, and inevitably some of those features have been requested of me since. So I set out a small list of ideal requirements:
[Perhaps you’re just here to 3D print your own, or have one mailed to you? Both can be purchased on the Etsy store.]
Firstly, the ring had to rise up. This not only adds to the drama of the reveal, but also from a practical point-of-view, as it makes it much easier to take the ring out of the box (and put it in to begin with).
Next, I wanted to address one of the most frequently requested things an iris is expected to be able to do, and that is to close completely! This is something irises (the overlapping leaf variety) typically don’t like doing . In fact they stubbornly refuse, and will gladly damage their own leaves permanently, rather than willingly comply with having their aperture fully-closed.
But really, a box should be able to shut properly – especially a box with life altering precious cargo! So I wanted to design in a way that closes the hole in the aperture completely. More on this later…
Finally, I wanted to make sure it’s relatively practical to carry. The previous version was on the large-size, and ideally I wanted this one to be able to be carried a little more stealthily if needed. Conversely, though, not so small that it takes away any of the ‘wow’ factor during a proposal. It also had to be a size to minimise fumbling when operating under excited – and let’s face it – stressful conditions.
Some additional ideals were to have it fully 3D printable on an FDM (Fused Deposition Modeling) 3D printer – which meant it needed minimal overhangs, and likely use the leaf printing technique to skirt around the opposing pins printing problem. I also wanted to have the rim of the iris as thin as possible to maximise internal space, without increasing the external size of the box.
Using a typical ring size as a starting point, I settled on the outside dimensions of 60 mm x 40 mm for the box. This gave plenty of internal volume to contain the ring, with enough ‘meat’ to build the box and iris around it. A quick rough 3D print confirmed it would be a suitable and functional size to hold and operate.
Next I logged into the Iris Calculator (of course!) and punched in the numbers to get me quickly in the ball-park of an iris that would fit on top as a lid. Happy with that, I then set about devising a way to get the aperture to close that last few stubborn millimeters.
Why is this so hard? Well, typically all the leaves will bind up when reaching minimum aperture, because they’re all fighting over the same space. But what if only 2 leaves are allowed to traverse that final gap, there might be much less of a fight. Essentially, I’d have the iris switch modes from an iris into a 2-leaf shutter. Perfect!
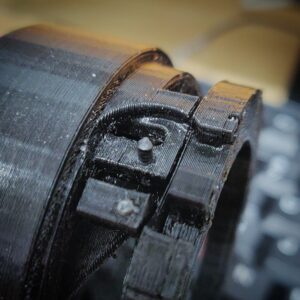
To achieve this, I designed into the pivot ring a semi-circle push-rod. This rod moves the pin holes of 2 opposite leaves, making them essentially rotate further than the rest of the leaves in the array. A cam operates the push-rod, and a spring provides a return force to switch back to ‘iris mode’ upon opening the aperture. A cam was needed because the turning direction of the iris to operate it, is in the opposite direction that the push-rod needs to go.
Now onto having the ring rise up!
Inadvertently I settled on basically the same method a camera lens adjusts its focus. That is, a riser with pins protruding that ride up and down diagonal slots cut into a collar. To prevent the riser moving rotationally there are vertical guide slots in the body that it slides up and down as well. Mounted onto this rise could be the ring holder itself – a simple slot packed with foam for the ring to be pushed into.
With this worked out, I could then have 3 lugs protruding outward that could attach to the inside of the top cover – one of which would be operating the shutter cam. These lug would have threaded holes for set screws to screw into the inside of the top. That way there are no external holes ruining the aesthetics, leaving a smooth – albeit 3D printed – finish on the outside.
So yes, it turned out to not quite being fully 3D-printable. The pivot ring needed screwing down onto the base, and set screws were needed for attaching the top. Plus of course the foam and a spring! However, the pivot ring could be glued in place instead of being screwed – a somewhat permanent fixing method, but technically once it’s assembled, there should be no need to disassemble it again. The top could also be pinned instead of using set screws (the down side being that this fixing method would be visible from the outside).
If you’d like to have a go at making your own iris design, please do sign up to our design software. You’ll be able to customise the size and many other design parameters. And once you’re done, you can export and print the templates as a guide.

