I wanted to explain in a little more detail about the blade overlap control usage in the Iris Calculator. This setting is somewhat under utilized by default, as it is set to ensure there are absolutely no light leakages. But it can really help - in combination with some of the other controls - to refine your iris diaphragm design. And it is especially useful when dimensions are tight and you need to maximize all the space you have available.
More room within the same dimensions
Quite often, when I'm designing an iris, I want the largest aperture range possible within a given outside dimension (OD). The Iris Calculator does a great job of working this out automatically off the bat, but the dimensions can still be improved further by tweaking and testing a few settings visually.
When you're homing in on your final design, you can adjust the blade overlap to really refine your dimensions. By doing this, you can reduce the width of the blades, creating more room - either for a bigger aperture, or for reducing the OD.
How does the blade overlap work?
As an example I'm going to be creating a design I need for a future article. The iris needs to have a low blade count and have an OD of around 100 mm.
First off I put some initial dimensions into the Iris Calculator and see what it suggests.
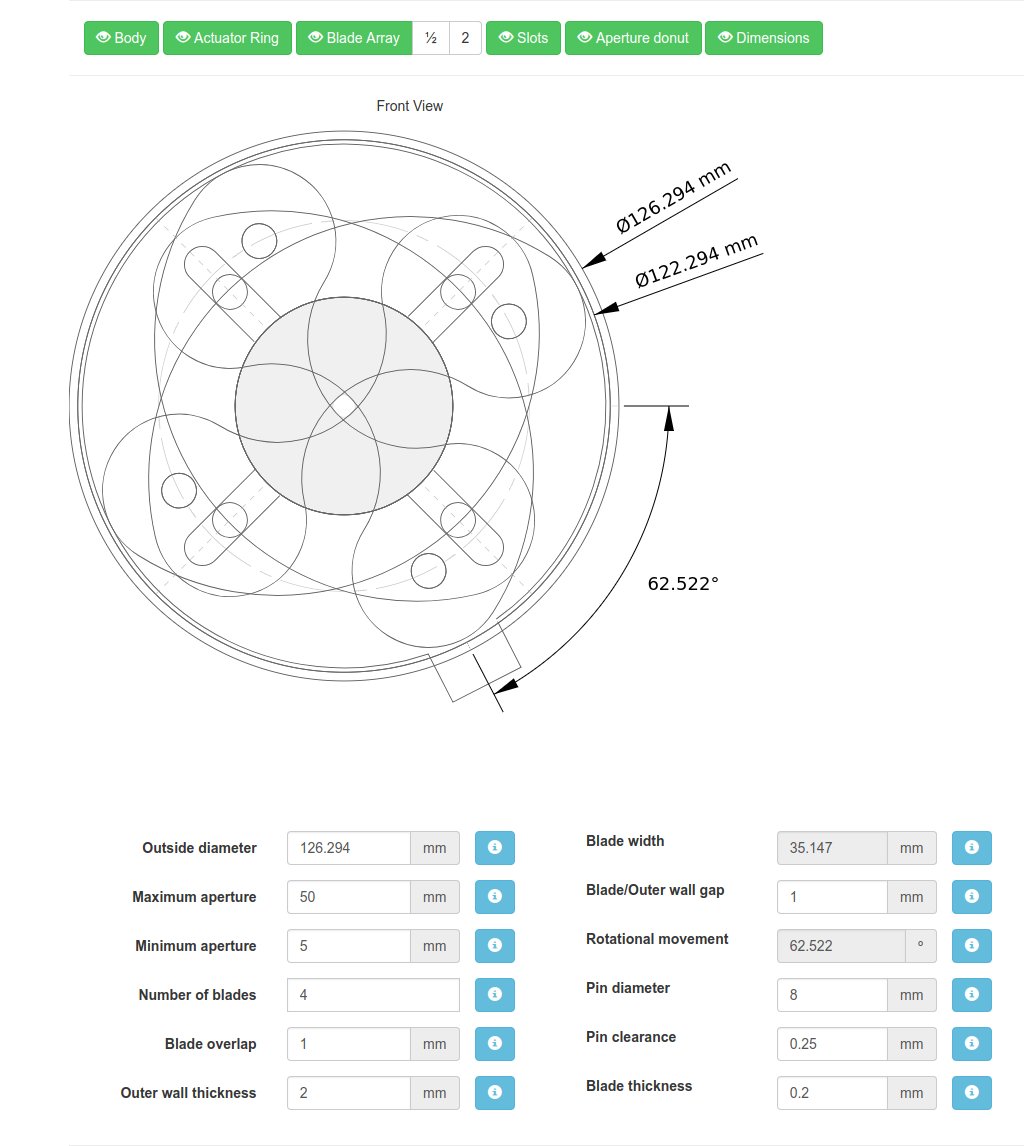
Now I can see what my iris could look like, I have a better idea of the space available, and how I'd like the end product to be.
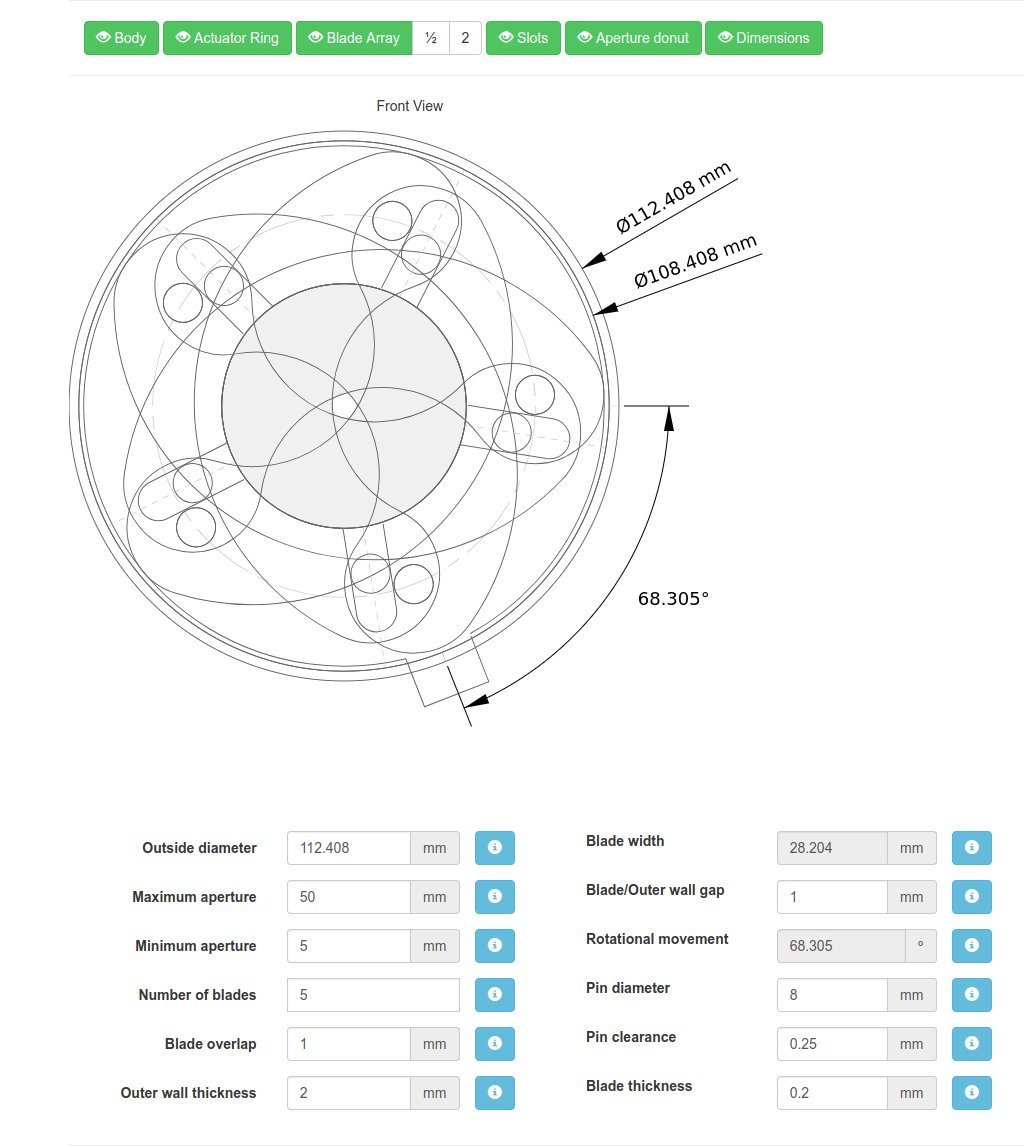
I want it to be simple, but I feel I want a slightly more circular aperture. To achieve this I need more blades, so I'll increase the number of blades to 5, and recalculate. This also has the benefit of of reducing the OD to bring it closer to the dimension I need, as more blades mean less space needed to park them in the body.
Now I want to work on getting a bigger range of aperture. A minimum of 2 mm should easily work with only 5 blades, so I'll adjust that next, and recalculate.
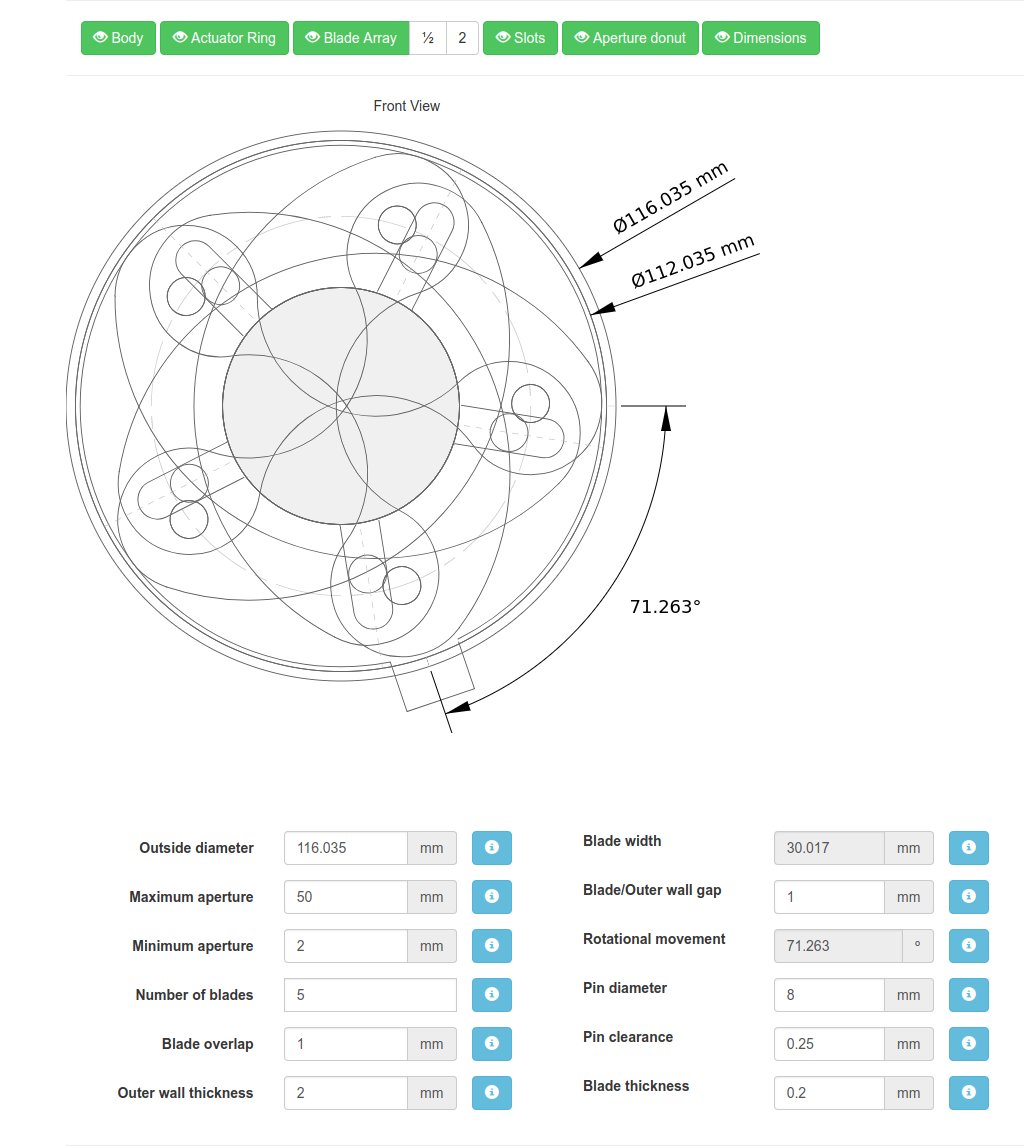
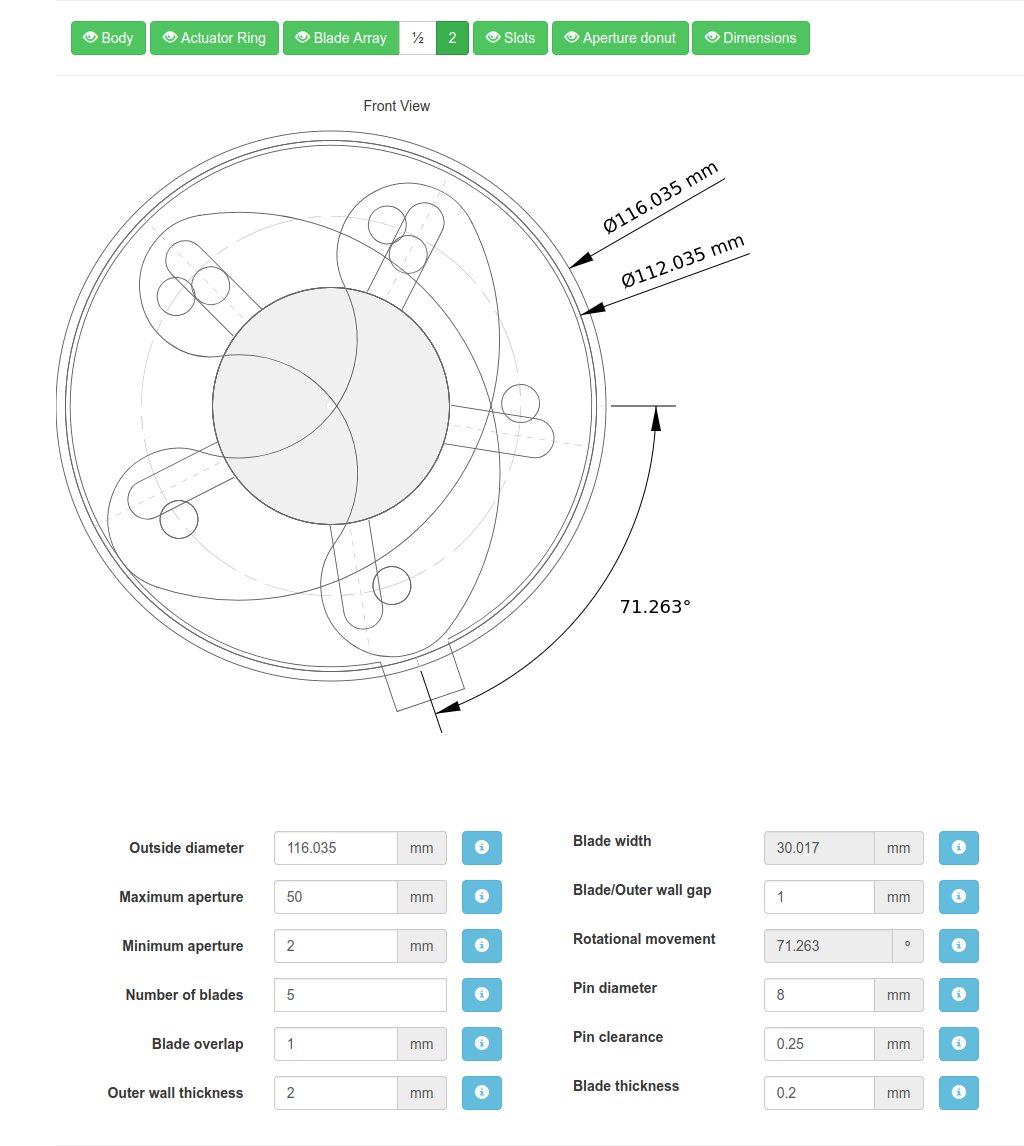
Great! Let's now look at how the blades are interacting with each other. So I'm going to switch to display only 2 blades, and inspect the overlap.
You can see that when the iris is closed down to minimum aperture, a lot of the blade's back edge stays outside of the maximum aperture. This overhang is unused, and it's material that I really don't need. If I remove this excess, narrowing the blades, I'll have the bonus of more space to play with outside of the maximum aperture. So let's decrease the blade overlap, and see what happens.
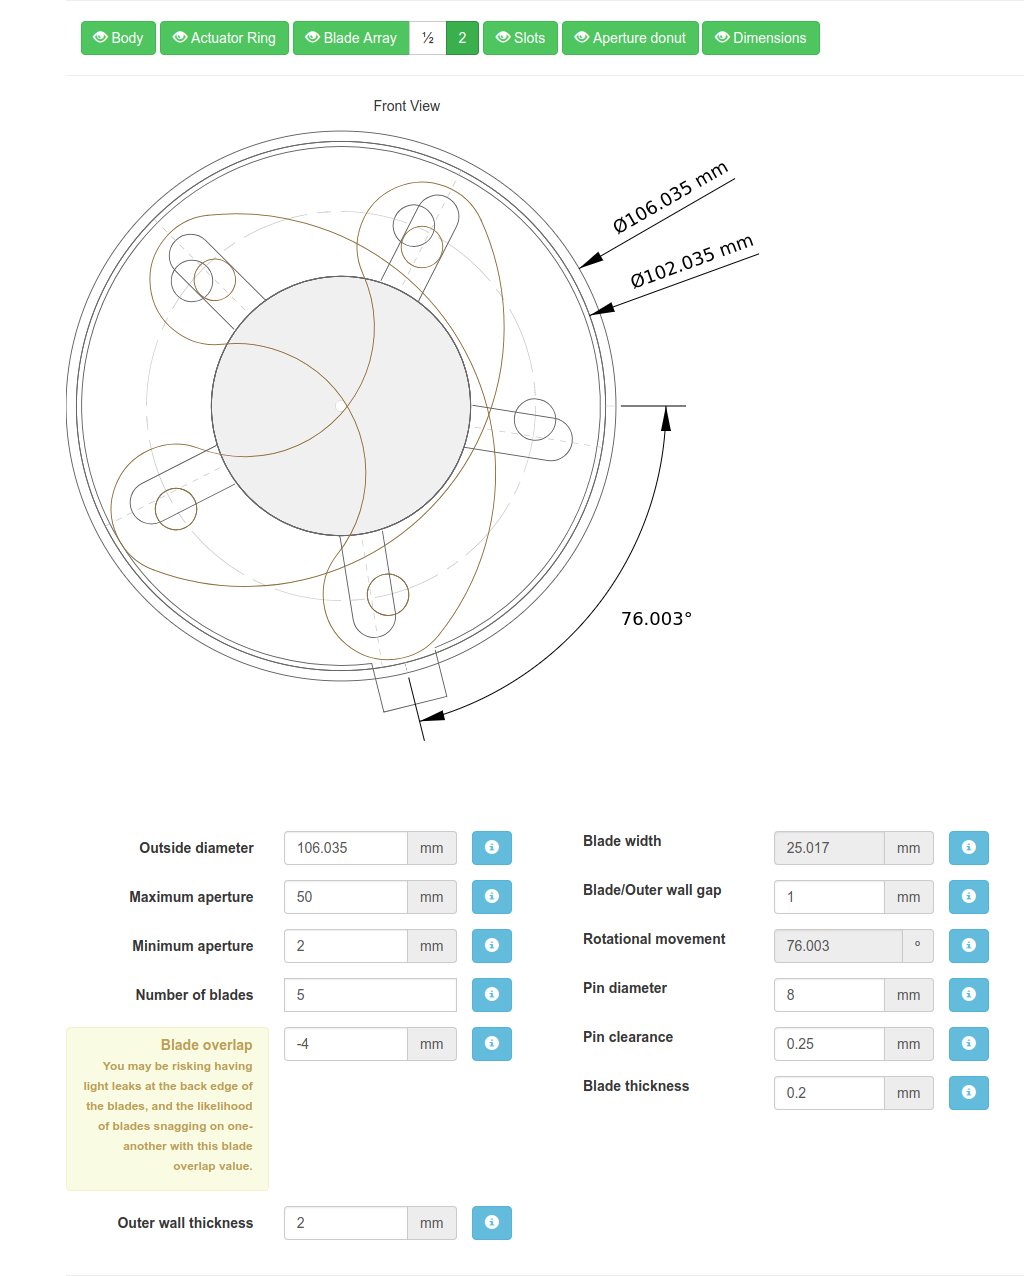
Reducing the blade overlap to ‘-4 mm’ immediately produces a positive impact on the iris design by reducing the OD by 10 mm!
The back edge of the blade has been brought forward to almost the maximum aperture, with no risk of light leakage (despite, in this case, the overly cautious warning).
I can even take this to an extreme.
If there is no concern seeing the blades from the opposite side of the blade array, the blades can potentially be thinned further. Aesthetically it’s perhaps not as neat, but technically the iris will still perform it's job admirably.
It’s a little harder to see (especially when there are a lot of blades), but at no point is there a gap at the back-edges of the blades leaking light. This is best demonstrated and identified by opening and closing the iris operation preview, whilst carefully watching the overlaps at the intersects.
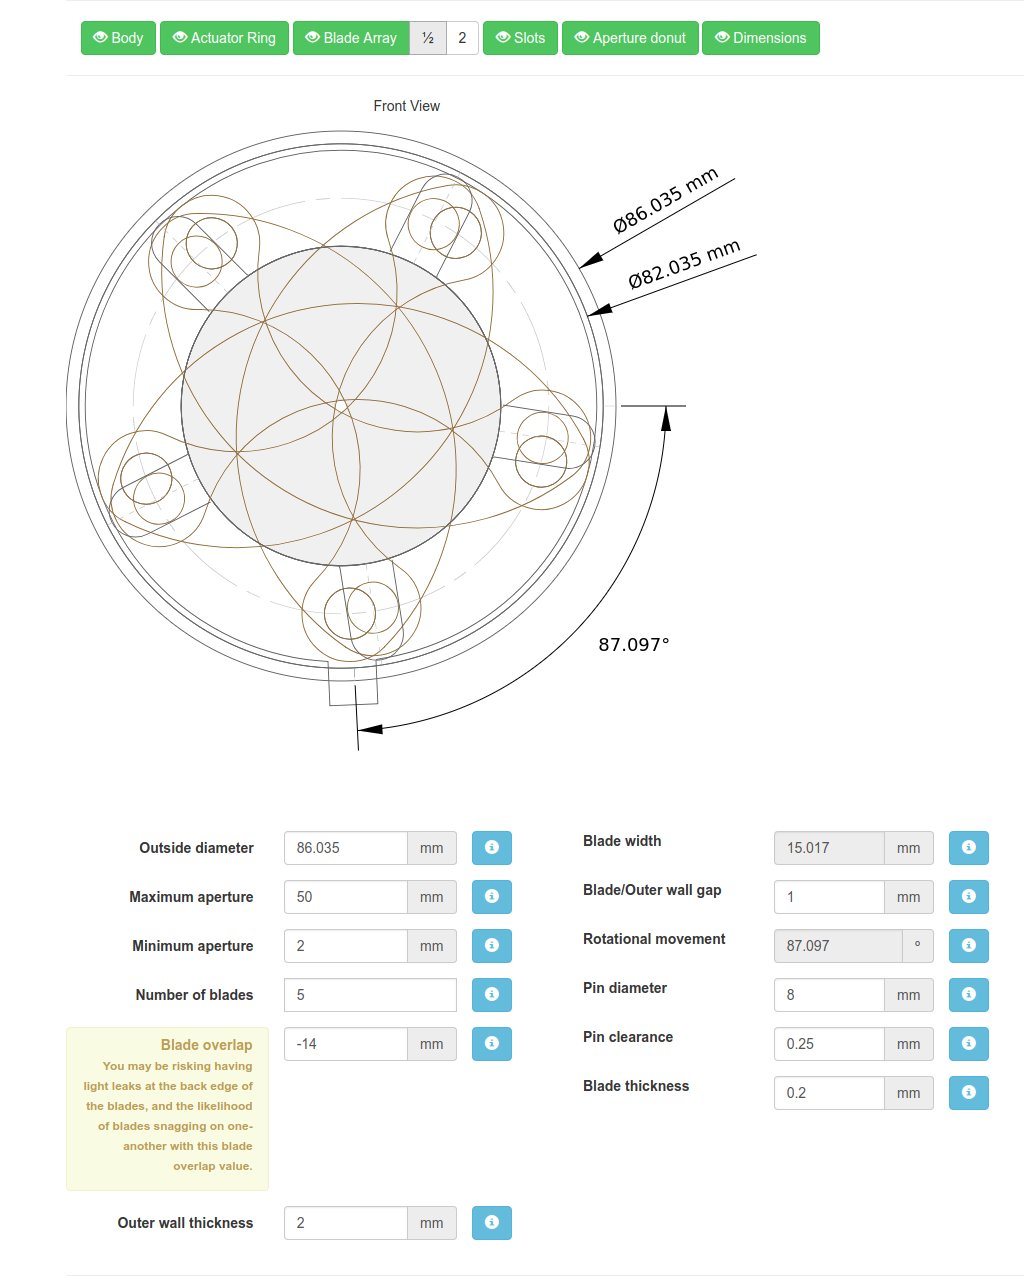
So there we have it. I've managed to reduce the OD of the iris by a massive 40 mm! Now I have a ton of space to either increase the maximum aperture, or use it for mounting assembly options.
You can also use the blade overlap control to prevent the pins from dropping out of the slots. Increasing the overlap, widens the blade, moving the pin back into the slot. This will increase your OD dimension, so you may prefer to manually move the pin towards the edge of the blade.
If you'd like to have a go at making your own iris design, please do sign up to our design software. You'll be able to customise the size and many other design parameters. And once you're done, you can export and print the templates as a guide.