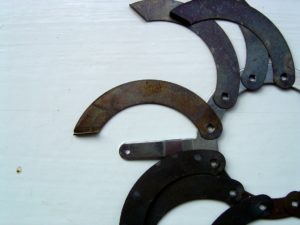
Manufacturing mechanical an iris diaphragm blade / leaf, identically, multiple times is a challenge. Usually you’re dealing with very thin material and needing to mount pins securely, with a high degree of accuracy. Here is a somewhat subjective brief run through of various methods of making blades / leaves for your iris.
(This article is being actively developed – please check back again soon).
Craft techniques
When you need a simpler solution for prototyping, or if you’re making an iris at home, you’re probably going to be reaching for cardboard, card, or paper as your material of choice.
Making the iris diaphragm blade
Hand cut
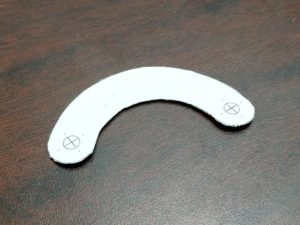
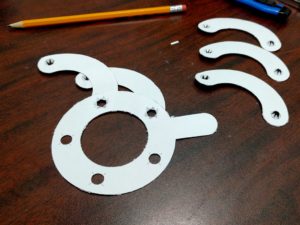
Print a template of the blade as a guide and stick it on your material. If you intend to use card, you can print the profile directly onto it. Then carefully cut around the blade profile with a pair of scissors or knife.
Die cutter / Laser cutter
If you’re a pro crafter you may be lucky enough to have a die or laser cutter available to you. Load the blade profile and let it work it’s magic.
Pins
Drinking straw
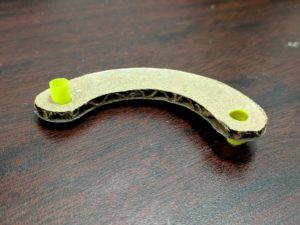
When your blades are made from thick enough cardboard, you can insert a drinking straw through the holes, and use these as pins cut to size. Glue it in place with one end flush to the surface and it should stay put without any issues.
Alternatively if you’re using card, you can glue the drinking straws directly onto it. See How to Make a Cardboard Iris.
Card and double-sided foam adhesives
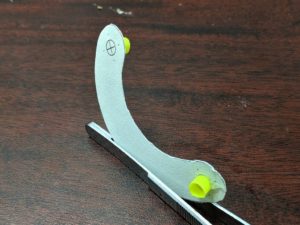
If you’re using card as your blade material, a smart way to create the pins is to use circular double-sided foam adhesives. To get them mounted accurately you can either print the blade with the pin location, or create a template that matches the blade profile with a hole in it as a guide. KiwiCo show this approach well in their video…
Burst hole
Piercing a hole and then using that material can be a simpler way of creating a ‘pin’.
You can read more about this craft technique here.
Metalwork techniques
There’s a whole world of metal working techniques, all of which are very much dependant on the types and thickness of materials being used (.004″ or .005″ shim material is a great source for making blades out of).
Making the iris diaphragm blade
Tin snips
Tricky to achieve a good result, but non-the-less blades can be cut individually with tin snips. Because the cut tends to make the material bend, you’ll probably find yourself with a hammer in your hand flattening the blades again afterwards.
Saw and file
For greater consistency, and a better aperture as a result, cut the blades as ‘one’. To do this, stack and clamp the blade material together in a block with a template or drawing on top. Then using a hacksaw, cut around the profile of the blade. Finish by filing the edges until they perfectly match the profile.
If you need holes for your pin mounting method, it would be wise to drill these first before cutting. These holes are also useful for helping clamp the material together by putting fasteners though.
CNC mill
Like above, you can cut the blades as ‘one’ by stacking and clamping the blade material together in a block, then mill. It’s probably best to sandwich them between two thicker pieces of material, to stop the layers lifting as the cut is made. Or, you could do them individually if you’re confident in the machine’s accuracy.
Wire EDM
Wire EDM is extremely precise and can produce blades to an accuracy of ±0.0001″ (±0.025mm). This is watchmaker territory, and would be a very desirable option for making iris parts.
Punch press
Probably not the best way to produce blades, but possible with the right tooling available.
Press tool
When making a very large quantity of iris blades – such as a production run for a product – investing in press tooling is the typical approach.
Making the pins
Screw / bolt
If your blade material is thick enough, it’s possible to thread and countersink the pin hole, then use a countersink screw as the pin
Rivet
A quick and simple pin is a pop rivet. It’s ready-made, and easily available off-the-shelf in a variety of diameters and heights.
Cut stock rod
Making your iris use standard sized rod as pins saves some machining. But depending on the fixing method, you may need to still remove some material from the ends.
Turn
Turning the pins on a lathe provides the opportunity to manufacture them to smaller tolerances.
Burst hole
Similar to the craft technique earlier, piercing a hole through the blade, and then using that material, can be a simpler way of creating a ‘pin’.
You can read more about the craft technique here, but for metal you’d need a shaped pin to pierce the hole correctly.
Mounting the pins
Epoxy
Scratch the mounting surfaces to give the epoxy something to adhere to.
Solder / braze
The blade will draw the heat away, so a higher temperature may be needed.
Screw / bolt
If your blade material is thick enough, it’s possible to thread and countersink the pin hole, then use a countersink screw as the pin. Ideally you’ll want to make sure that the bolt head is flush to avoid catching the other blades.
Rivet
As mentioned above; a quick and simple pin is a pop rivet. You’ll need to be consistent when installing each one, to make sure they’re all square. And quite possibly you may need a little more clearance in your slots, to allow for excess bulge or tilt.
Riveted pin
If you’re using a softer metal, the pin can be held in place by placing it in a press to fatten/roll-over one end.
Spot-weld / Resistance welding
More specifically: projection welding – as you’ll be joining two different thicknesses of material together. This technique benefits from having a jig to hold the pin in place on the blade. With the right squeeze and power settings, an almost indestructible join is created. Read more about it here.
Burst-hole and turn-up
Forget pins, and use a burst-hole with a turn-up the other end. The blade rotates around the burst-hole, with the turn-up sliding through a slot in the wall of the body.
Other techniques
- Injection molding, like the spaghetti iris. This is only cost effective for very large quantities.
- 3D printing – Read the 3D printing advice for FDM 3D printers.
- Woodworking
